 |
| Before |
To every reader out there who has been considering a home improvement project, but has been hesitant to move forward due to lack of experience, fear of failure, or high expenses, this post is for you!
For those who are not familiar with Pinterest, it is a social media website where people share ideas. I stumbled upon a Pinterest article describing the process of staining cabinetry and it captured my attention. The writer of the article described the cabinet refinishing process as simple and affordable, then went into detail about types of stain and the tools required for completion. I decided I would give this a shot and told my husband about the idea. He initially looked at me like I was looney, but was on-board after reading the article and seeing the photos on Pinterest.
We used a gel stain to refinish our cabinets. Gel stain is just like any other stain with the exception that it has the consistency of pudding. The thickness of the stain makes it more forgiving when applying to cabinetry because it doesn't soak into the wood as quickly or deeply.
Now here is how the article made refinishing cabinetry sound in a nutshell.
Step 1. Sand cabinets lightly
Step 2. Apply stain
Step 3. Apply another coat of stain
Step 4. Kick back in your favorite chair and enjoy your newly refinished cabinets!!
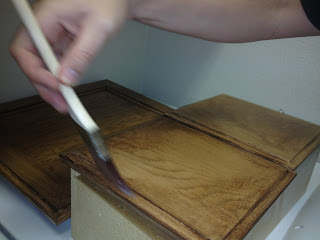
We discovered early on the process isn't quite that simple, but well worth the work. The article mentioned using a sock to apply the gel stain. After the first coat was applied we came to the conclusion that a paint brush did the job by far better and more efficiently. I imagine we would have spend much more time and energy applying multiple coats of stain using the sock method.
By using a brush, we only needed two coats of stain to achieve the finish we were seeking. The most cumbersome part of the process is the 24 hour dry time between coats. You have the first, second, and potentially third coat of stain, finished with at least two layers of poly-coat to protect the finish. The fumes can be overwhelming at times, especially after the second and third day of staining.
Supplies you'll need to achieve this look:
-Sanding Block ( we bought an angled block)
-Gloves
-Painter's Tape
-Gel Stain
-Satin Poly/Topcoat
-Tack cloth
-Postal wrapping paper (to protect floors)
-2 stain brushes
-Painter's pyramids
-Paint thinner
Once the final layer of poly-coat was dry we added new hardware and voila!! Brand new cabinets for for less than $100.00.
 |
| After |


lovely!
ReplyDelete